There are a few different ways to set up the audio on the cameras for different scenarios. For each scenario, refer to the Mic Input Panel to adjust how the camera handles inputs:
Scenario 1: A Group of People (with One Key Individual)
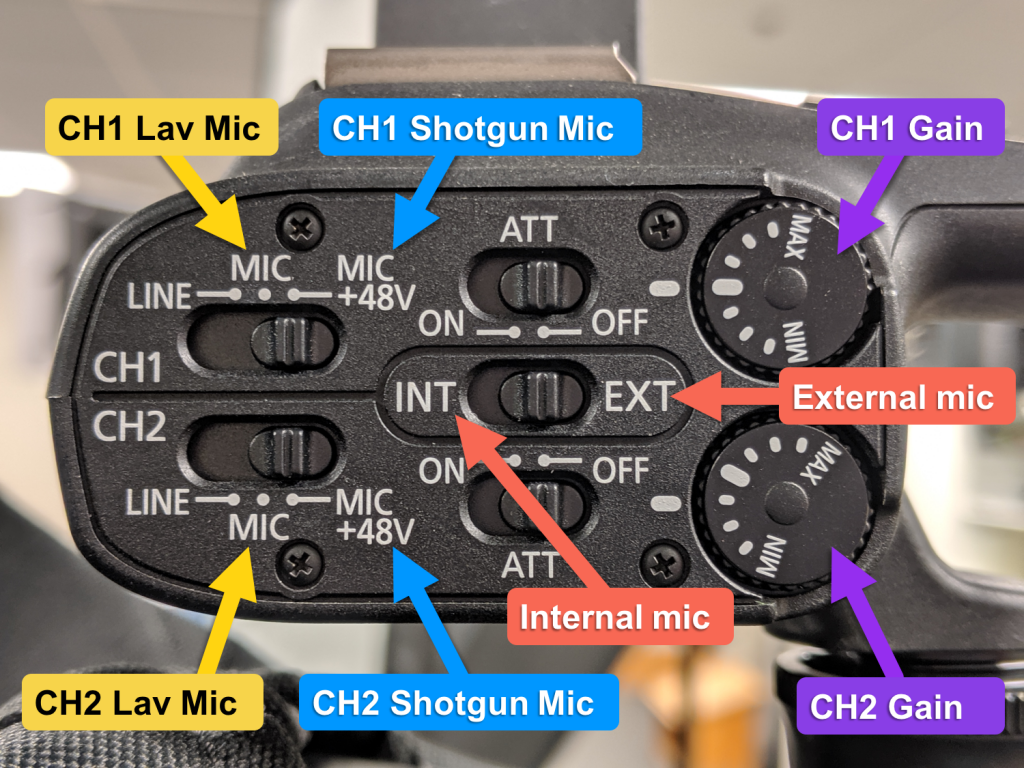
Mic Input 1 = Shotgun mic
- Make sure EXT/INT (red) is set to EXT
- Set the CH1 to +48v (blue)
- Adjust the gain wheel (purple) until the audio levels are between -6 and -12db while the person is using their normal speaking volume
Mic Input 2 = Wireless Lavaliere mic on Key Individual
- Make sure EXT/INT (red) is set to EXT
- Set the CH2 to mic (yellow)
- Adjust the gain wheel (purple) until the audio levels are between -6 and -12db while the person is using their normal speaking volume
Menu Channel Settings
When using 2 mics on 1 camera, you need to make sure you can hear both mics in your headphones.
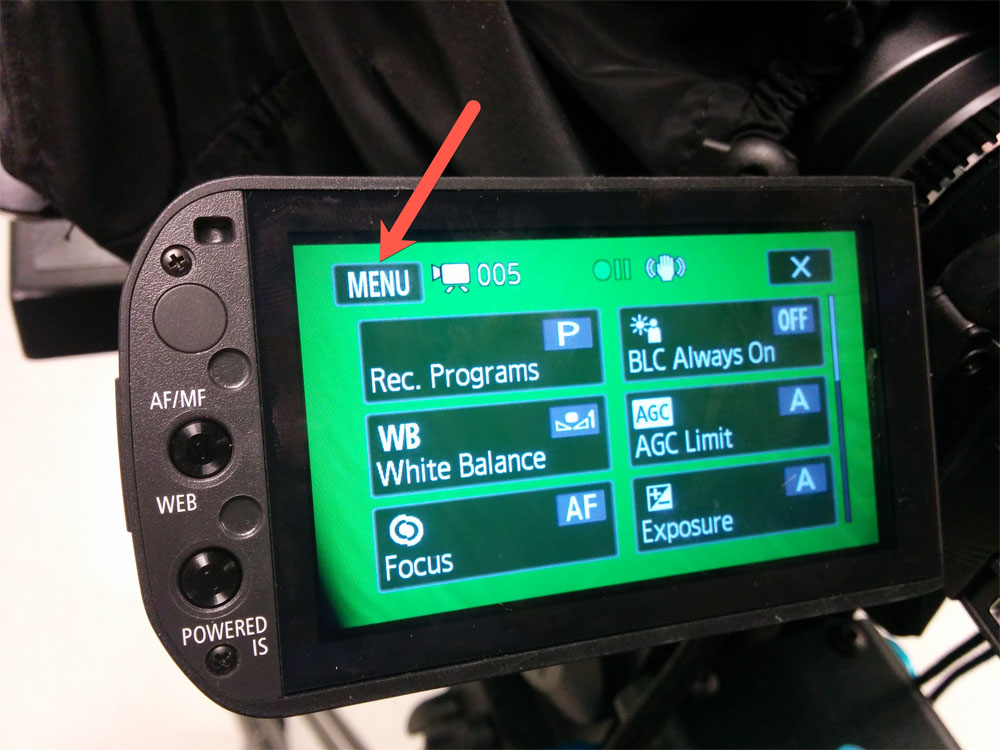
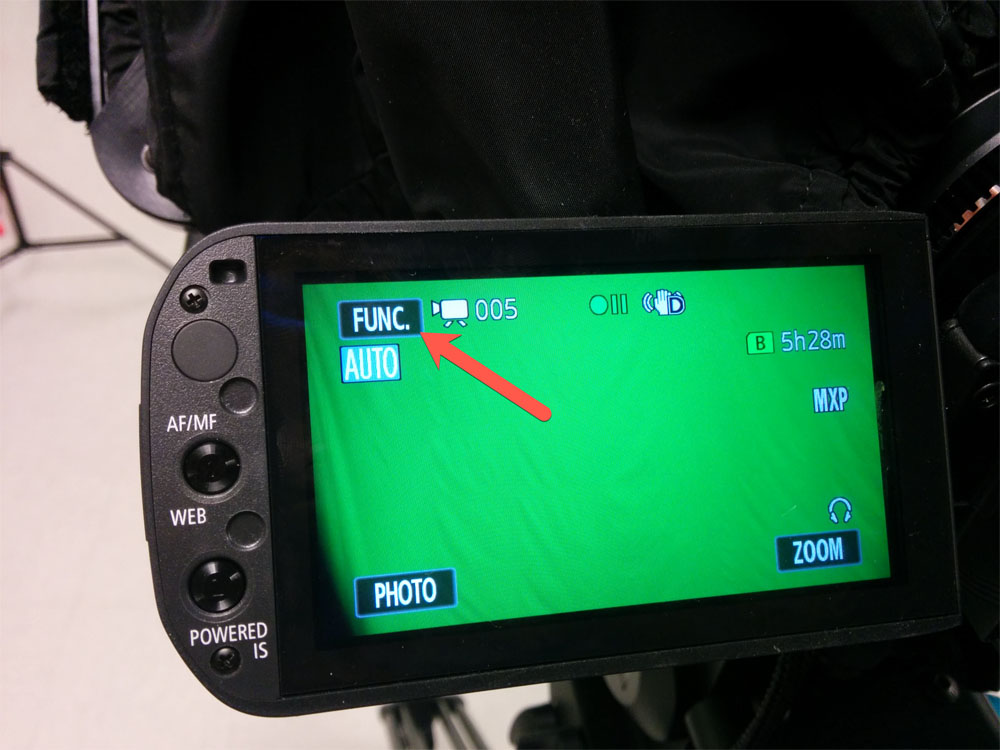
Press FUNC.

Press MENU
Under the CAMERA icon, scroll to XLR Rec Channel
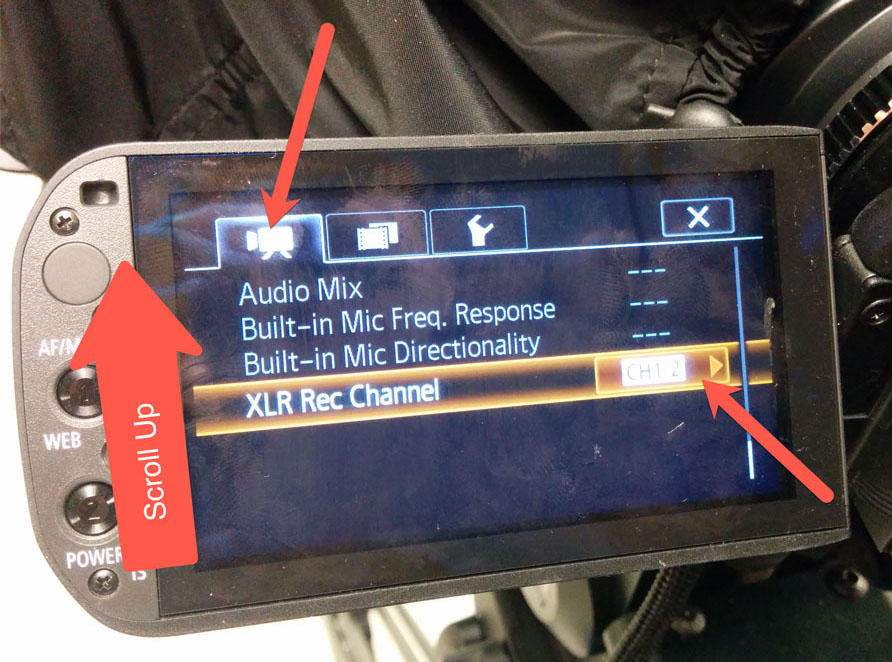
Use CH1 whenever you are using 2 mics. You should be able to hear one mic in your left headphone side and the other mic in your right headphone side. Audio input into CH1 is recorded to channel 1, while audio input into CH2 is recorded to channel 2.
Scenario 2: A Group of People
Mic Input 1 = Shotgun mic
- Make sure EXT/INT (red) is set to EXT
- Set the CH1 to +48v (blue)
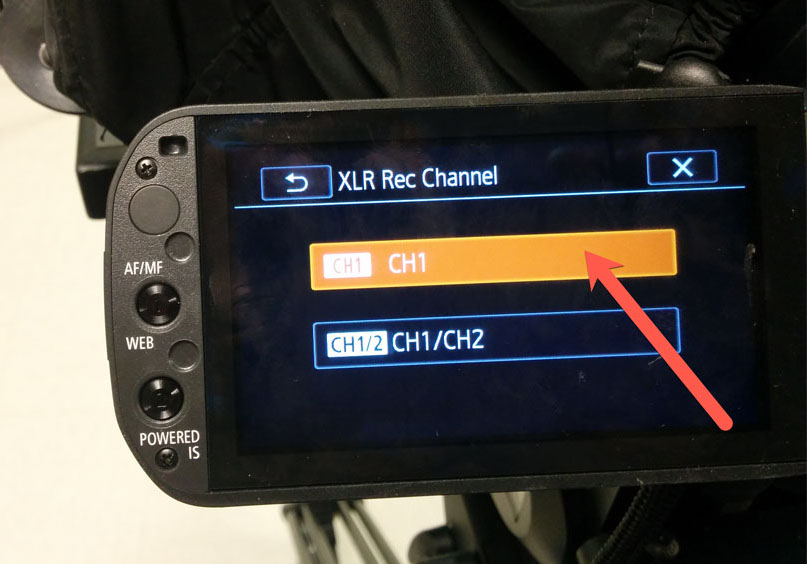
- Set XLR Record Channel to CH1/CH2. In the CH1/CH2 setting, audio input into CH1 is recorded to both channels, so you should hear audio in both your left and right headphone sides.
- Adjust the gain wheel (purple) until the audio levels are between -6 and -12db while the person is using their normal speaking volume
Common Audio Problems
Problem 1: The mic in Channel 2 is not picking up anything
Step 1: Press FUNC
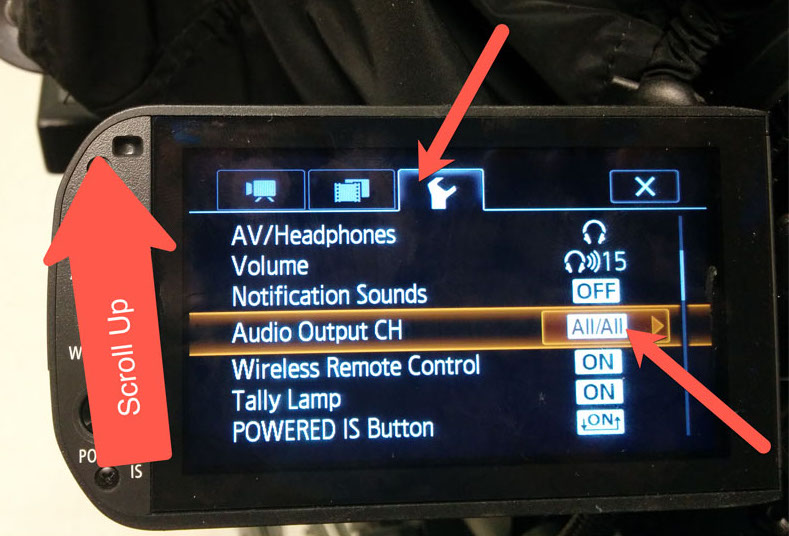
Step 2: Press Menu

Step 3: Press the WRENCH icon and scroll down the menu to select Audio Output CH
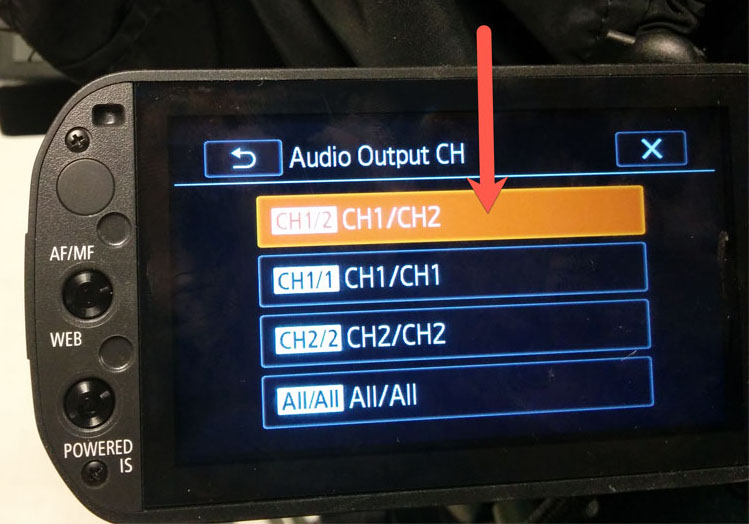
Step 4: Select CH1/CH2
Additional Audio Tips
- MIC 48+ is phantom power. It is needed to power shotgun mics (without batteries) and wired lavaliere mics.
- Wireless lavaliere mics or any microphones that use batteries do not need phantom power. Use the regular MIC setting.
- Aim for a gain of -6 to -12 db. You should never hit zero because your audio will “peak” and become distorted.
- Mic ATT is Attenuation. Use it for louder events where the sound will otherwise peak.
- Ask the speaker to test check mics
- If the sound in headphones sounds like very loud static, go to:
- Menu → wrench icon → AV/headphones → select headphones
- Audio that is too quiet is easy to boost but audio that is too loud is probably ruined
Test your knowledge!
This interactive presentation will ask you a series of questions about audio on the XA10 camera.