If you’ve tried everything and your audio still does not sound right, check that the settings on your Wireless Mic are set to these standards:
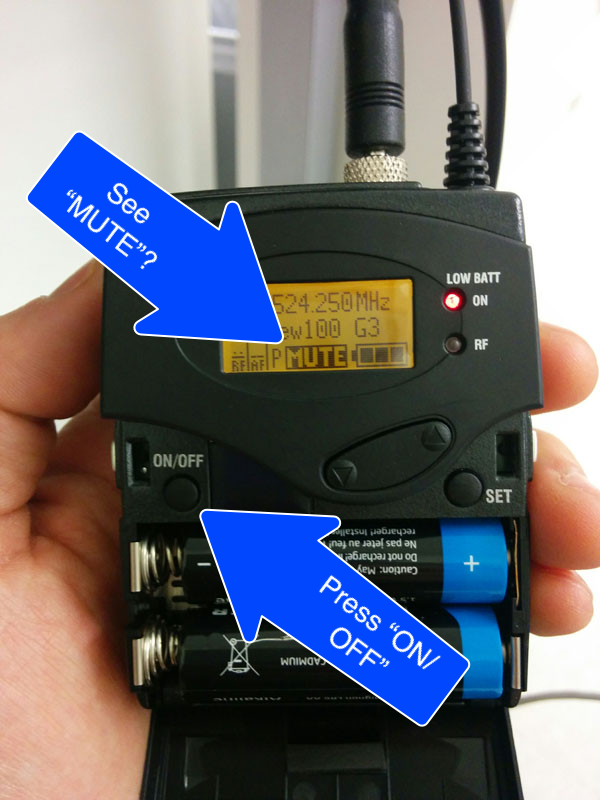
Mute
If you see “MUTE” on your screen, press the “ON/OFF” button once to unmute
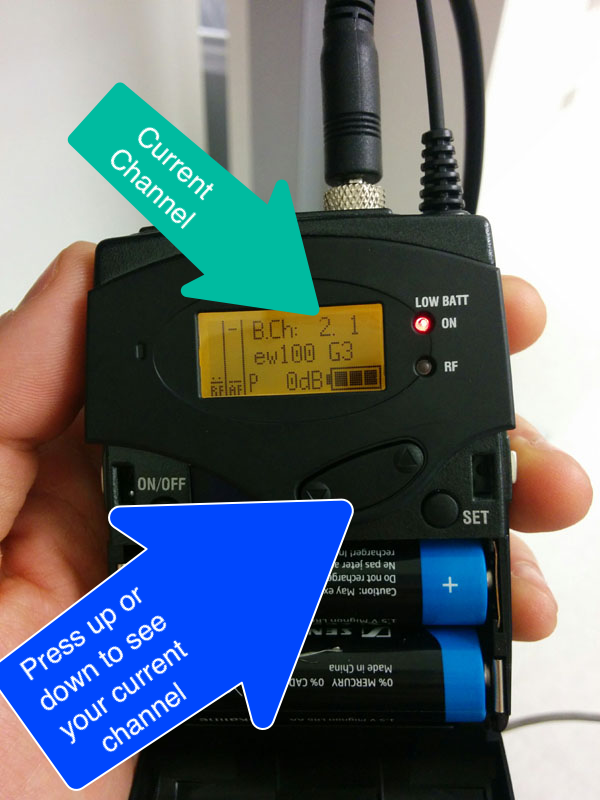
Check Your Channel
Press “UP/DOWN” to see your current channel. Make sure both your transmitter and receiver are set to the same channel.
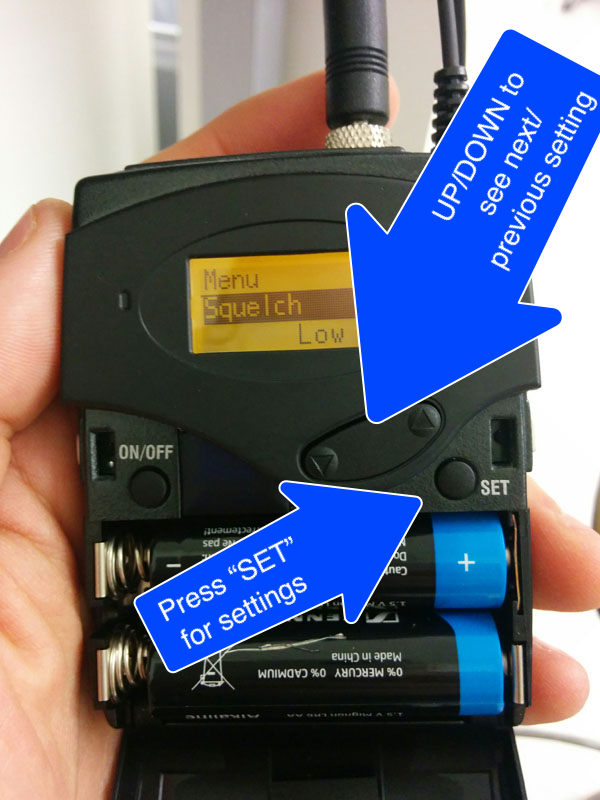
Access Settings
To check your settings, press “SET” and use “UP/DOWN” to see other settings categories.
Change Settings
To change a setting, press “SET”, then use “UP/DOWN” to change it.
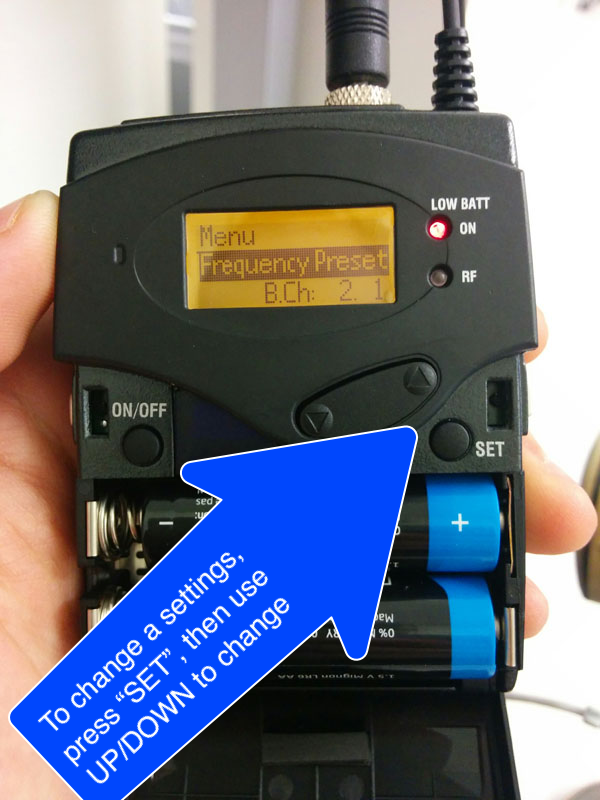
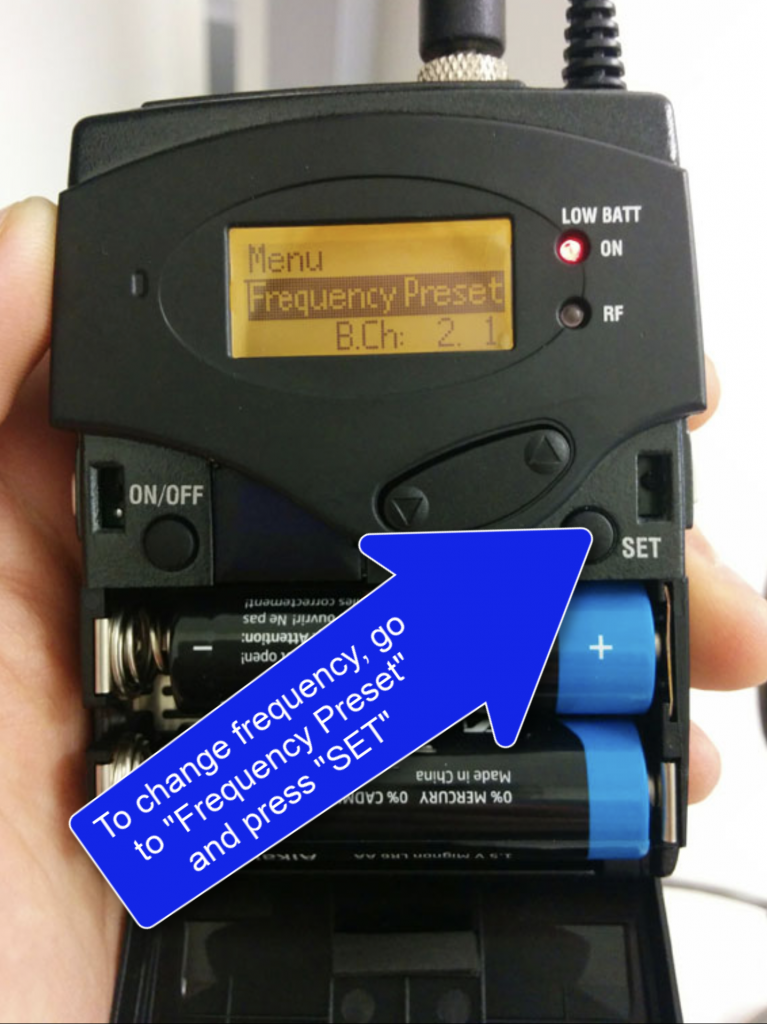
Frequency Preset
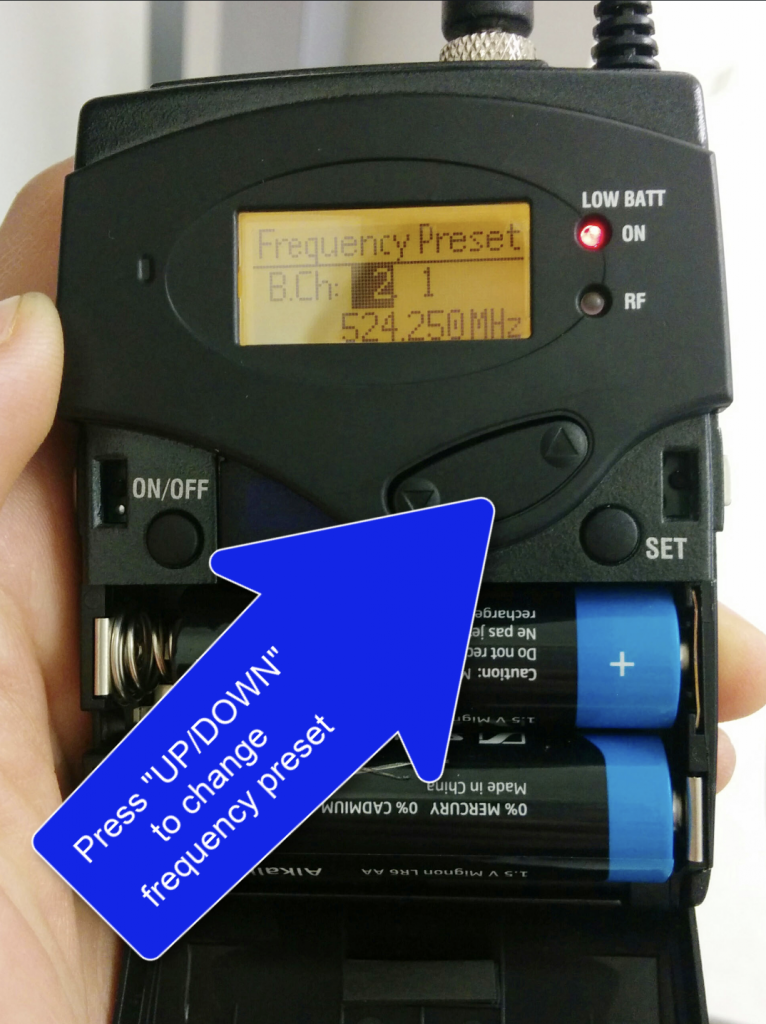
Ensure the frequencies are the same on both your transmitter and receiver. To change frequency, go to “Frequency Preset” and press “SET”. The numbers on the bottom are your current frequency. The highlighted number is the preset (e.g. 1, 2, etc.). Press “UP/DOWN” to change the preset.
NOTE: If you have more than one set of mics, ensure that each set is on a different frequency (e.g. interviewer set to channel 2.1, subject set to channel 2.2)
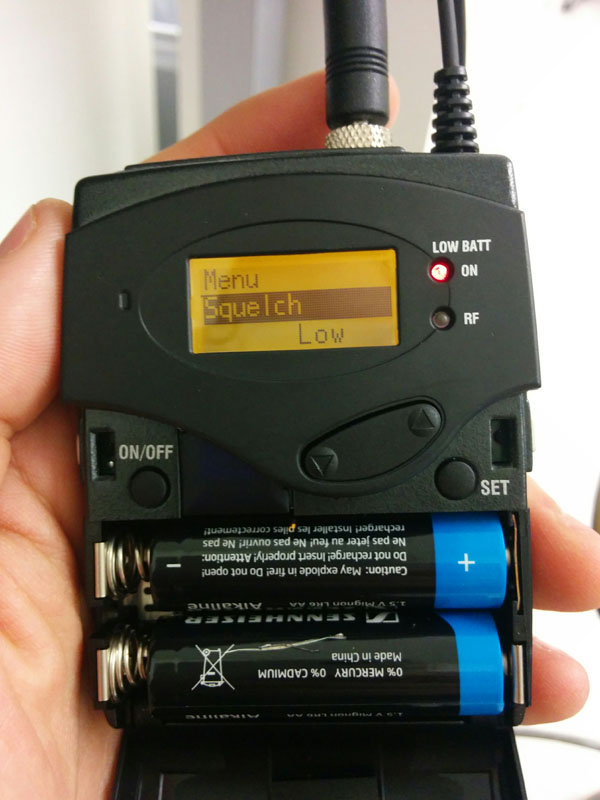
Squelch
Squelch should be on “LOW”
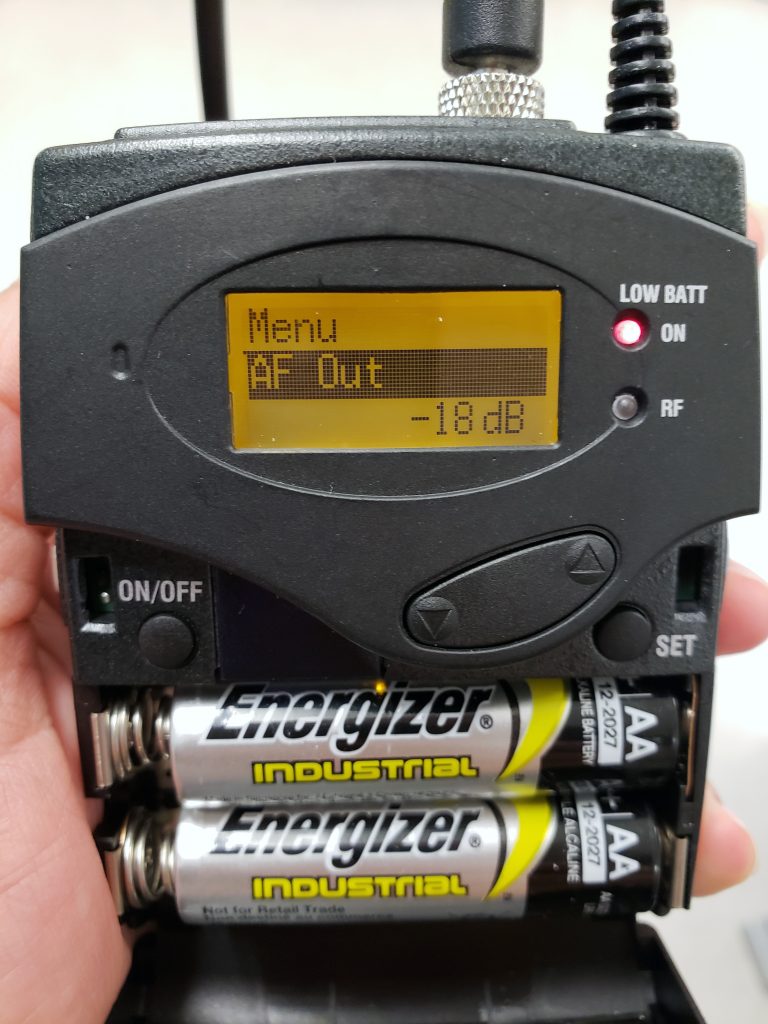
AF Out
AF Out should be -18
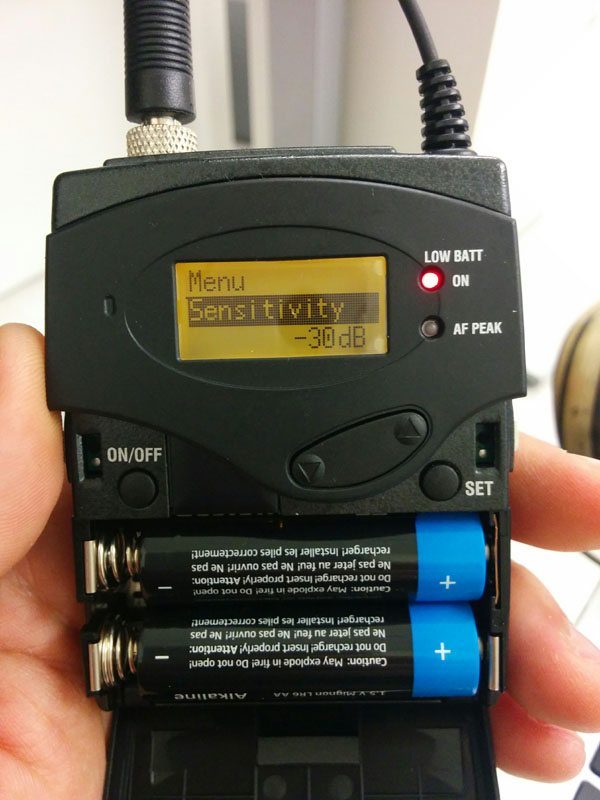
Sensitivity
Sensitivity should be set to -30db
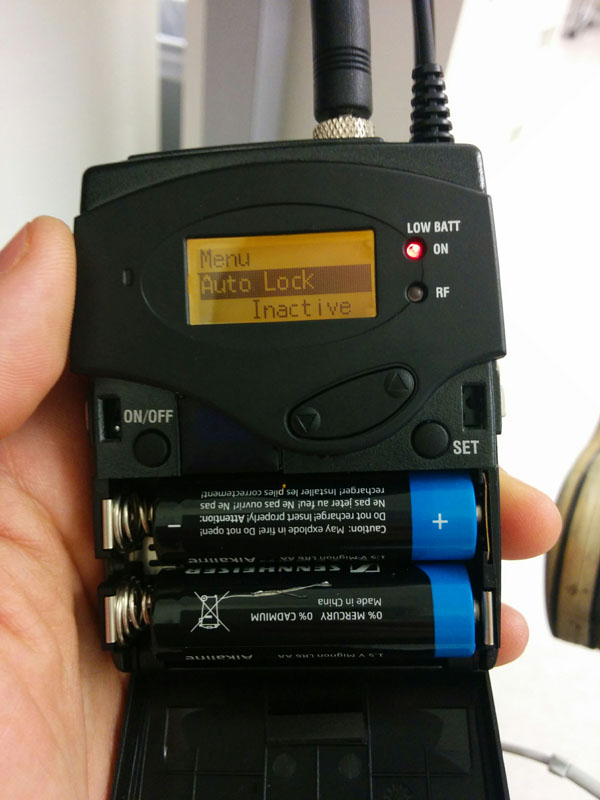
Auto Lock
Auto Lock should be set to “Inactive”
Attenuation
If you have made all of the above adjustments and your audio still sounds over-modulated (too loud), then your best bet is to turn on attenuation. It’s a switch on the video camera audio panel. If it is off, turn it on.