Make sure your inputs are correct
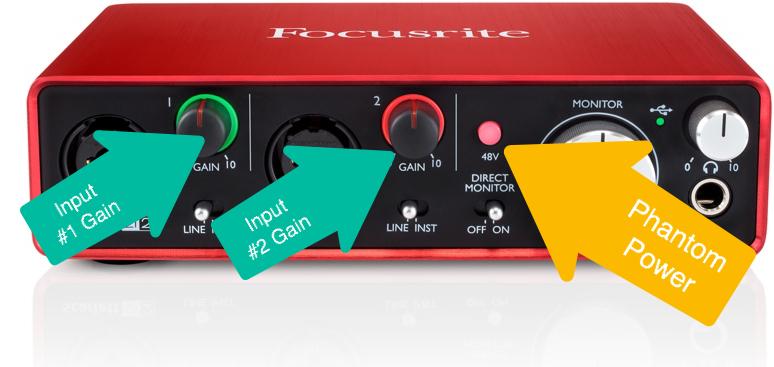
Verify that your mic inputs are correct on the Scarlett 2i2 box. Mics should be plugged into inputs one and two (green). Set their gain to the middle.
Be sure to turn on the Phantom Power (yellow).
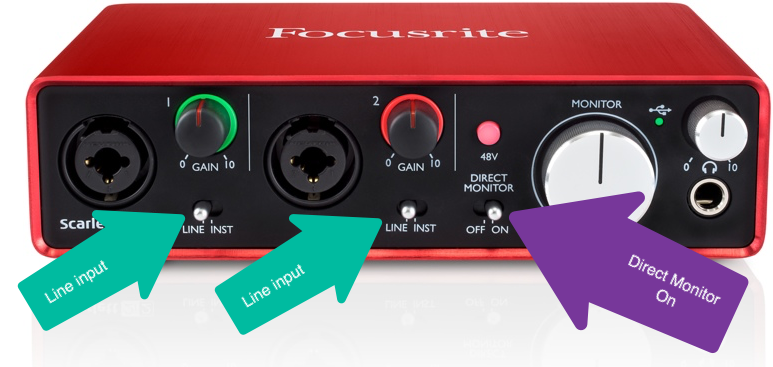
Make sure inputs are set to Line (green below). Turn on the direct monitor (purple) if you want to hear yourself live through the headphone jack on the Scarlett. (You’d want to do this if you are recording a podcast and you want to match the volume of the voices by ear using the gain knobs.)
Make sure the Scarlett 2i2 is connected to the computer by USB
Check that the USB cord from the back of the Scarlett 2i2 is connected to the computer.
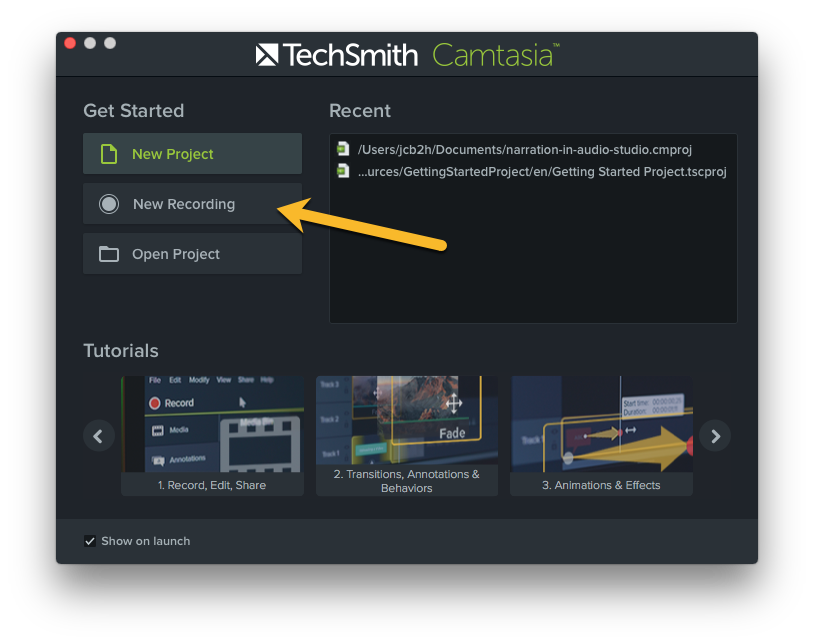
Open Camtasia from the dock and start a new recording

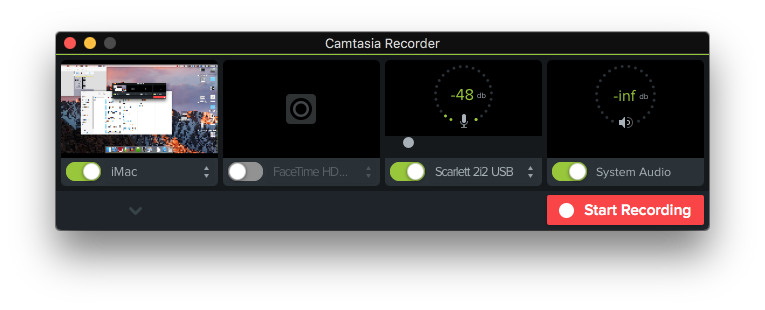
Make sure Camtasia is set up properly
Make sure you are capturing the whole screen, that you have the mic turned on and set to the Scarlett 2i2, and that you are capturing system audio.
Set up your Skype (or similar) and when ready, hit Start Recording
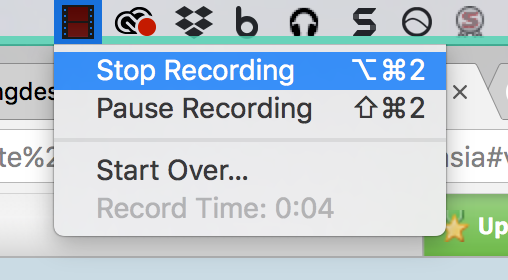
Open up the software you’re using to interview remotely, and when you are ready to start hit the red “Start Recording” button (seen above). When you are done hit ⌥⌘2 or click on the film strip icon at the top of the screen and click Stop Recording.
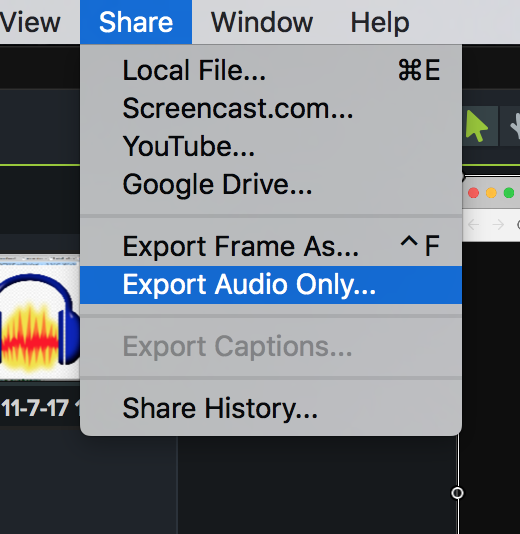
Your project will open in Camtasia. You don’t need to do anything in Camtasia except export the audio. Click Share, then Export Audio Only.
Now open your audio in an audio editing program. You’re done!