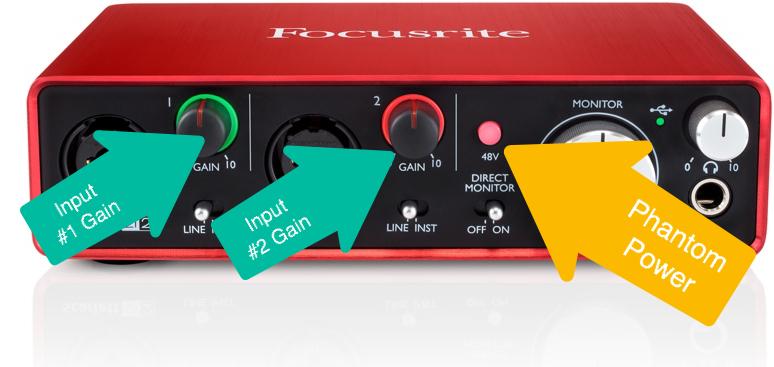
Make sure your inputs are correct
Verify that your mic inputs are correct on the Scarlett 2i2 box. Mics should be plugged into inputs one and two (green). Set their gain to the middle.
Be sure to turn on the Phantom Power (yellow).
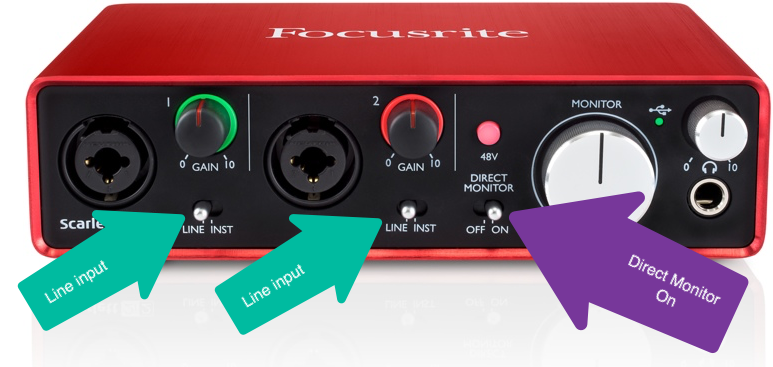
Make sure inputs are set to Line (green below). Turn on the direct monitor (purple) if you want to hear yourself live through the headphone jack on the Scarlett. (You’d want to do this if you are recording a podcast and you want to match the volume of the voices by ear using the gain knobs.)
Make sure the Scarlett 2i2 is connected to the computer by USB
Check that the USB cord from the back of the Scarlett 2i2 is connected to the computer.
Open Hindenburg
Click the Hindenburg icon in the Dock OR (if you don’t see it in your dock) open Finder -> Applications and double click Hindenburg.

Choose Scarlett 2i2
If prompted, choose Scarlett Solo as input. (You may also choose it as output to listen through the headphones connected to the Scarlett, or leave the output on the default choice, which will play through the computer’s speakers.)
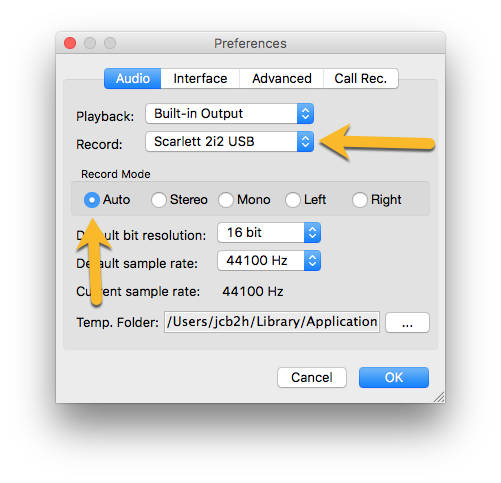
Adjust your Hindenburg Preferences
Go to the menu Hindenburg –> Preferences. Verify that your record is set to the Scarlett. Adjust your Record mode to Auto (unless you really know what you’re doing).
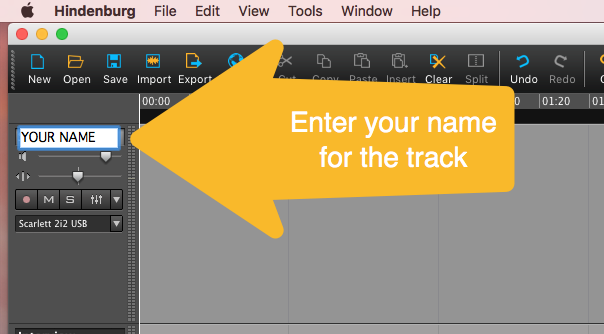
Rename your track to your name or “Narrator”
This is always good practice to name your tracks. You won’t always have just the one.
Save your track now!
It’s a good idea to save now and save often. You can save directly to the computer, but we recommend you copy your work to a cloud service (Google Drive, Dropbox, UVA Box, etc.) as soon as you’re done for the day.
Now click save in Hindenburg and save your project.
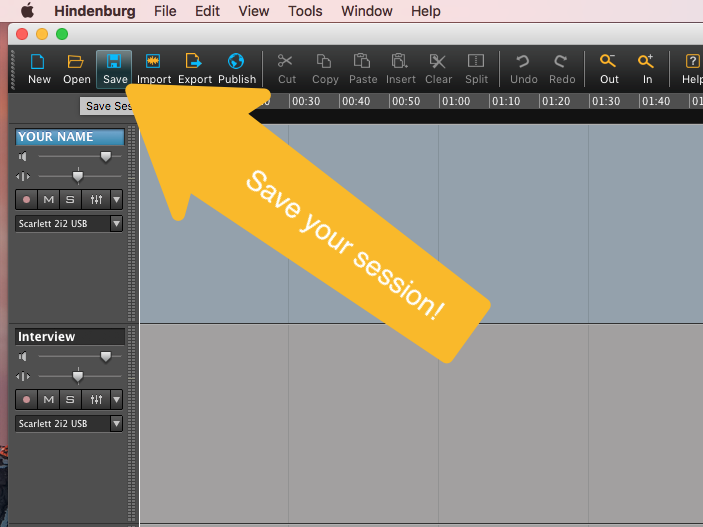
Save often!
NOTE: Hindenberg saves both a folder “YOURPROJECTNAME Files” and a file “YOURPROJECTNAME”. You need to copy both to cloud storage when you’re done!
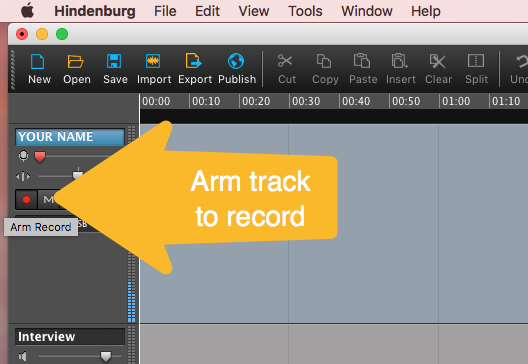
Arm the track to record
Click the red button to arm the track to record.
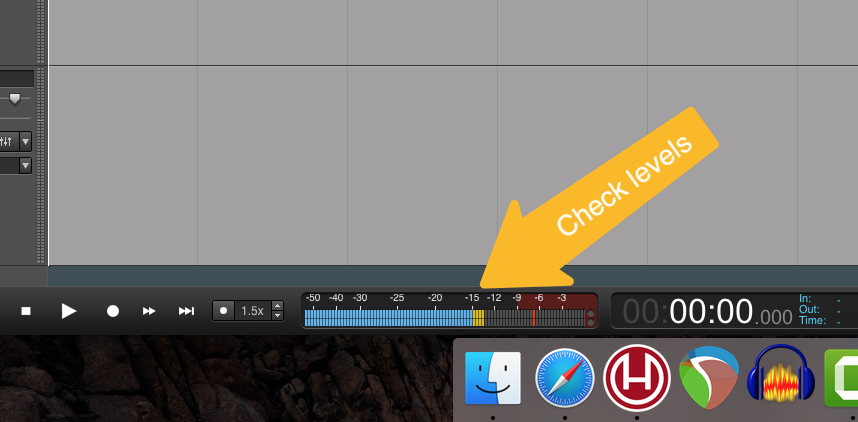
Test your levels
Read your narration as you intend to read it, and watch the bottom of the screen to see your levels. If you’re going too far into the yellow, or are hitting red, you need to adjust the gain on your mic using the gain knob on the Scarlett 2i2 (see photo at top of page).
Hit record to start recording
Press the red record button at the bottom of the screen to begin recording. Speak / shout / sing / raspberry into the mic (as your recording demands).
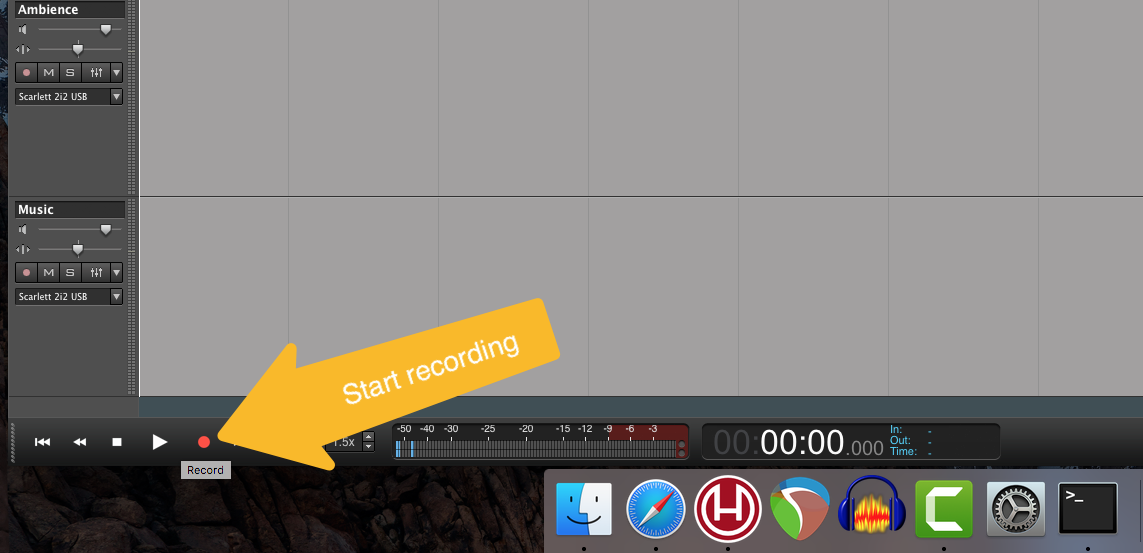
Press the stop button when you are done.
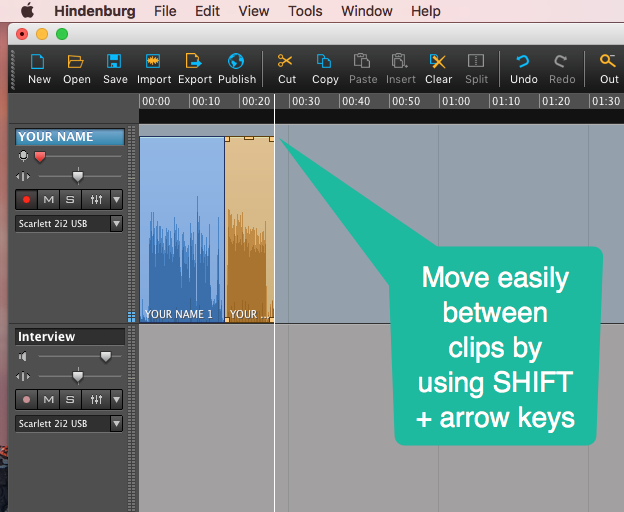
Record the next segment or re-record your segment
An easy way to navigate back to the beginning is to use the arrow keys while on a track. Press SHIFT + left or right to go to the beginning or end of a segment.
Press the play button to hear a track, starting at the playhead.
If you record again, you’ll erase what is there now. Otherwise you can start recording from the end of the current segment to get two or more segments.
Use lead-in mode as needed
To give yourself a brief period of lead-in prior to recording, CMD + click on the record button to turn on lead-in mode. A small triangle will appear next to the record button.

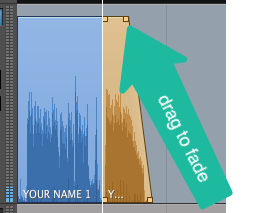
Fade clips as needed
To fade in or out, click and drag the small squares at the corner of a segment.
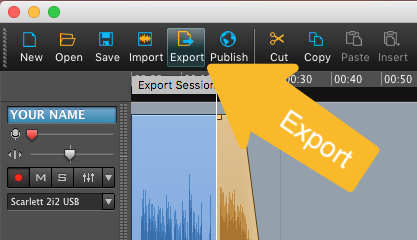
Export your project
When you are 100% done, you export your project to either a WAV file or an MP3 depending on how you want to use it. WAV is for archival, MP3 is for publishing on the web or turning in as an assignment.
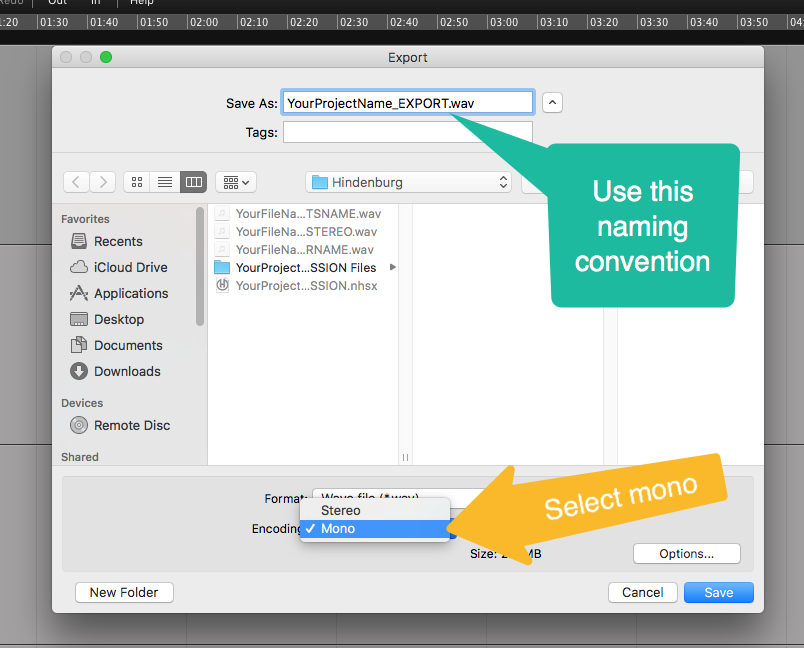
It’s a good idea to use the naming convention YOUR_PROJECT_EXPORT.wav for your export, so you know that’s the exported file.
You’re done!
For more information on using Hindenburg, check out their guide page.